a blog by Peter Leonard


This weekend’s task was to fix up a rare “portable” Unix computer from Sun Microsystems. Best-known in the 2000s for enterprise hardware, Sun in the 1990s was equally dominant in desktop Unix workstations, before the rise of Linux on commodity x86 PC’s.
Yet Sun workstations, with their 20” CRT monitors and large, flat ‘pizza box’ cases, were nearly impossible to bring into the field — or between offices. Sensing a market, Sun introduced their SparcStation Voyager in 1994 as a portable system that offered much of the power of Solaris, their operating system, and the SPARC RISC processor, in a machine small enough to bring onto an airline.
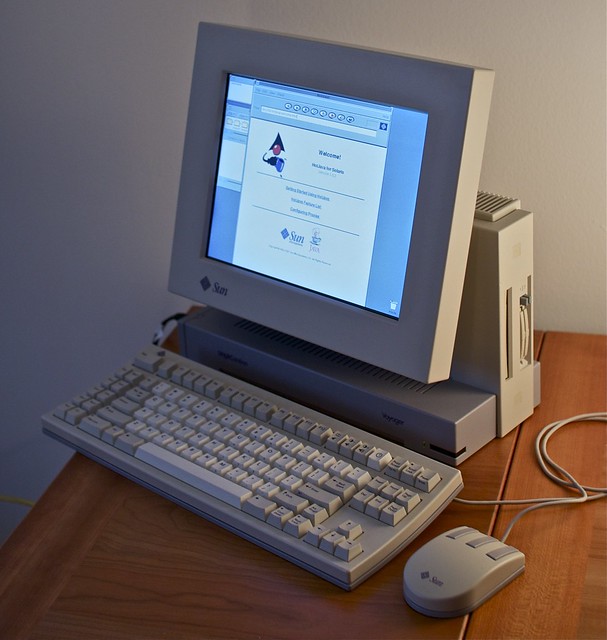
Portable power came at a price: $14,000.00 for the color model. I saw only one in person during the 1990s, and I think it belonged to a Sun salesman. It’s safe to say the number made — not to mention the number surviving — is pretty low. In fact, the Voyager is peculiar enough to warrant its inclusion at the Computer History Museum in Silicon Valley.

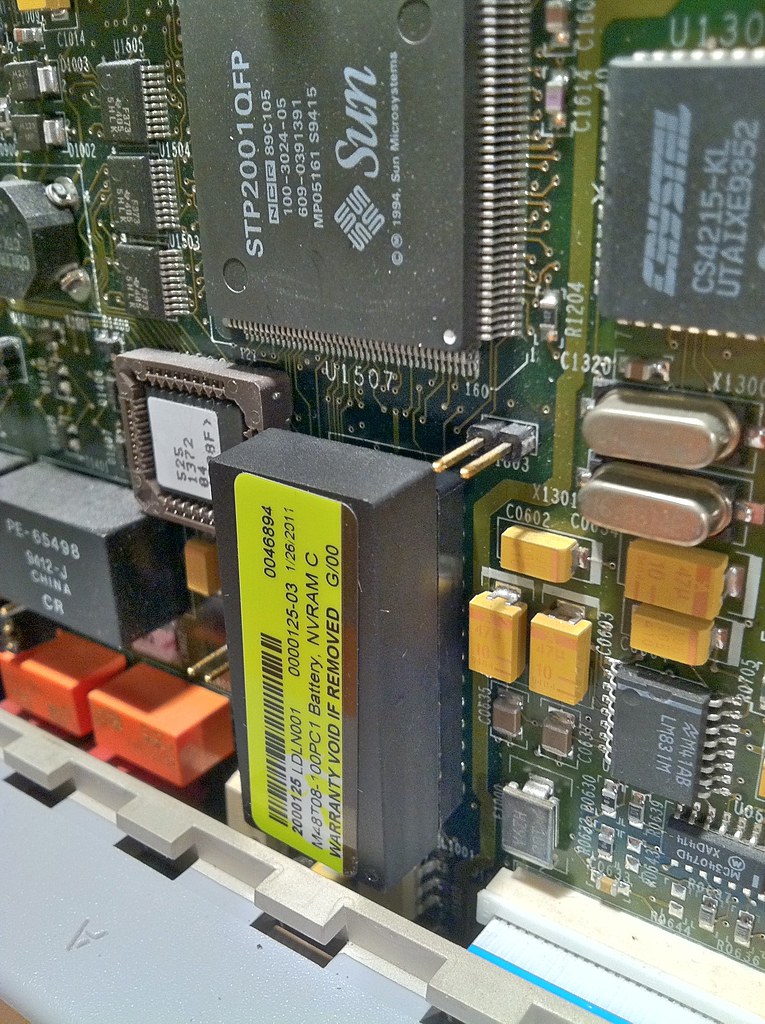
After sixteen years, it’s not surprising if a few hardware gremlins have to be exorcised before a given Voyager will work correctly. As shown above, the battery which stores the nonvolatile RAM — the settings for the clock, which hard drive to boot from, etc. — will eventually give out. The result is a scrambled configuration, and, amusingly, a randomly-generated password protecting the machine which you have no hope of figuring out. Unfortunately the Voyager’s battery is built into the nonvolatile RAM chip itself — a bit of vertical integration which helps save space, but makes fixing an expired battery more complex (and expensive). Here’s the back of the machine with the case open:

The original combination battery and memory chip is in the lower-right corner, above the port marked “A”, and has a yellow barcode sticker on it. This chip has long since been End-of-Life’d, but miraculously there’s a pin-compatible replacement still available for about $30. Here’s the old chip, top, with the replacement on the bottom:


The new chip plugs right into the open socket on the vertical motherboard:

The new chip is a good few millimeters thicker than the old one, which can make clearance a bit tight. In fact, my original IDPROM chip was nested in a thin plastic guiding frame, which reduced the risk that you would bend a pin as you inserted a new chip. There’s no room for that luxury with the replacement, which nestles right up against the plastic case:
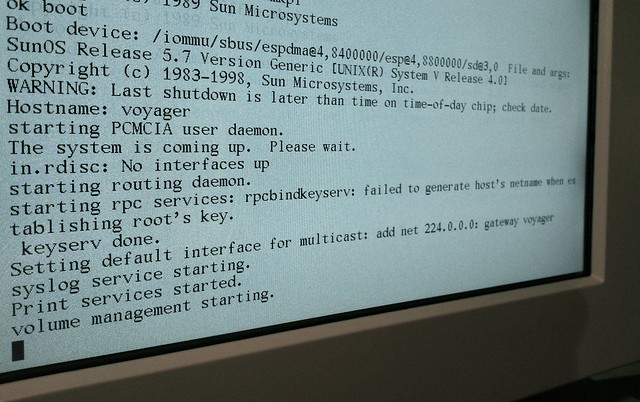
Once the new chip is in place, we’ll reboot and see if the machine’s bogus password is cleared:
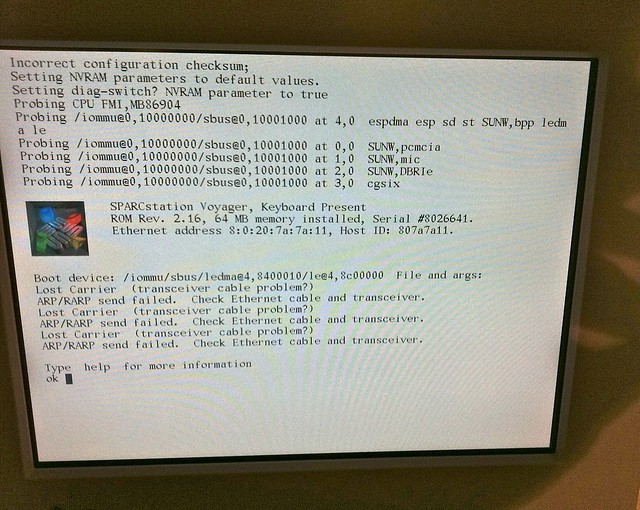
A rare case where an error message is good news: the Voyage’s memory has been cleared so completely that it’s back to its factory state, trying to boot over the (absent) network. The “ok” prompt will allow us to issue a boot command from the SCSI drive and we’ll be up and running:
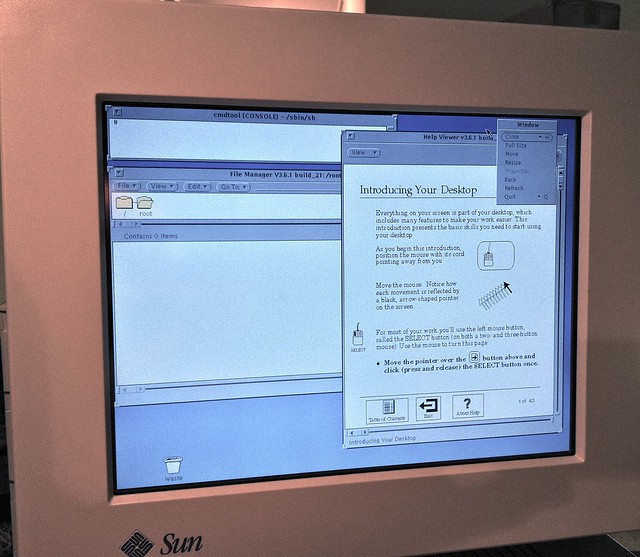
… all the way into OpenWindows, at which point you can pause and reminisce about the Unix Wars of the 1990s:
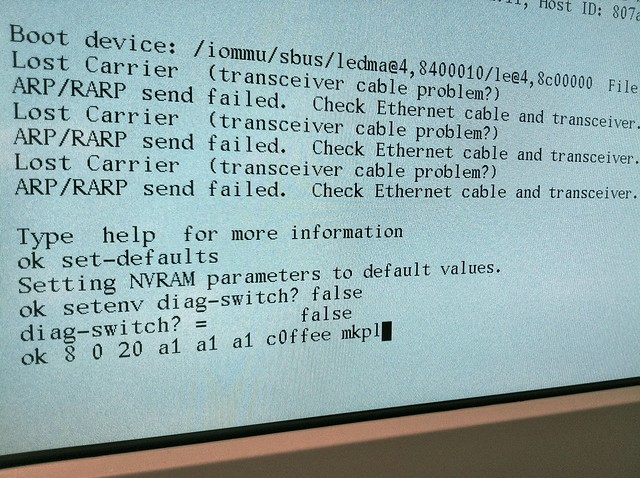
On some kinds of Sun workstations, you may find that your machine’s Hardware Ethernet (or M.A.C. number) has been wiped during the process. This wasn’t the case on my machine, but if it had been there’s a great page of instructions online on how to write the relevant bits back to the chip at a low level, which looks something like this:
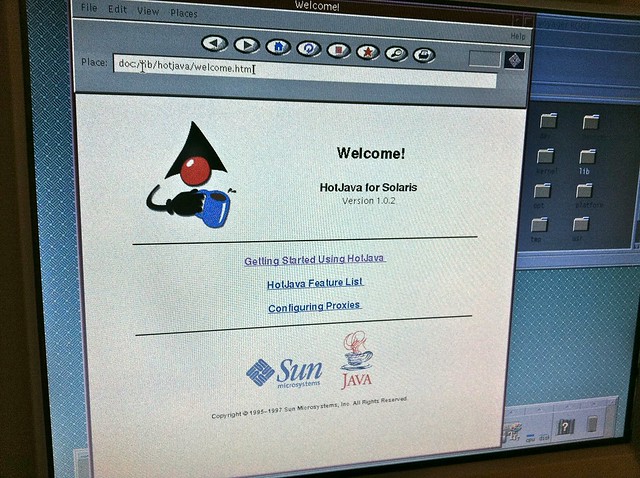
Once your Voyager is up and running, you can enjoy the delights of Solaris 2.3-2.7, for example the written-in-itself HotJava browser: